Home Contact Sitemap login Checkout
STOLSPEED Pty. Ltd.


STOLSPEED Pty. Ltd.
  • Home
  • Shop
  • Vortex Generators
    • Vortex Generators
    • Benefits Vortex Generators
    • How VGs Work
    • Design Stolspeed VGs
    • Flight testing
    • Slats vs VGs
  • Testimonials
    • Testimonials
    • Zenith 801
    • Zenith 750
    • Zenith CH 701
      • Zenith CH 701
      • Placing the Stolspeed VGs on the 701
      • Origin 701 design
      • Comparison 701/Savannah
    • Zenith 601
    • Techam P-96
    • Sport Cruiser
    • Sonex
    • Skyranger
    • Savannah
    • RV 6
    • Rans S7
    • Rans S6
    • Piper PA-22/20-180
    • Pazmany
    • Motorcycles
    • Long Eze
    • Lancair legacy
    • Lambada
    • Kolb
    • Kitfox
    • KIS4 Cruiser
    • Kelleher Lark JK-1A
    • Just Aircraft Superstol/Highlander
    • Jodel
    • Jabiru
    • Glasair Sportsman
    • Foxcon Terrier 200
    • A22 Batfox
    • Fisher Dakota Hawk
    • Cub
    • CTSW Flight Design
    • Bushcat / Cheetah
    • Bush Caddy
    • Breezer
    • Bearhawk
    • Belite Ultracub
    • BD-4
    • Avid Flyer
    • Allegro
    • Australian Lightwing
    • A22 Valor FoxBat
  • Installation
    • Installation
    • Positioning - wing
    • Placement - Horizontal Stabilizer
    • Positioning - vertical fin
  • Meet JG
  • FAQ
  • Contact
Home/Testimonials/Zenith CH 701/Placing the Stolspeed VGs on the 701 Print This Page

Placing the Stolspeed VGs on the 701

For the main wing, place the front tips of the VGs 175mm in front of the main rivet line on the top of the spar.  There are two rivet lines out near the tips, but use the line that runs the length of the wing. Starting at the wing tips, place the first 15 VGs at a spacing of 60mm with the template, then the rest at 90mm spacing.

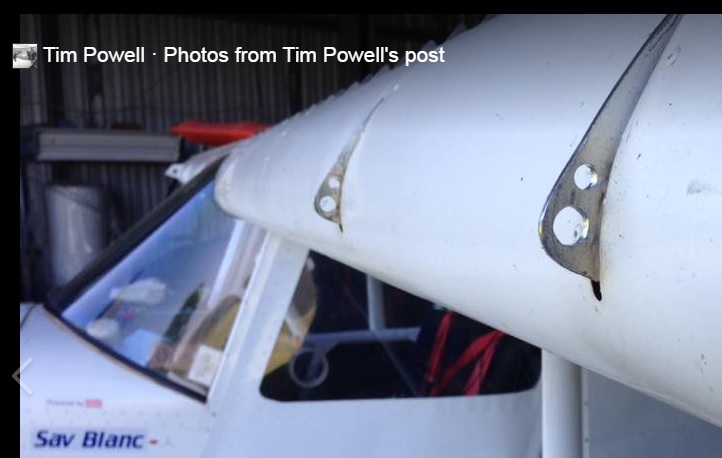
The easiest and tidiest way to remove the slat brackets, is just to cut them off about 12mm from the skin, along the profile of the leading edge.  Then they look like miniature stall fences, and you don't have to fill the holes in the skin.
Tip from John Austin (750)  Cut the brackets at 20mm out from the skin, so that you could re-attach the slats again, if desired. The highest point is 18mm from the skin, and the holes are 3/8 and 1/4" to give a feature look.

Here's a neat and simple way to cut the brackets back so that they look good.


For the tail, place the VGs on the elevator rather than the horizontal stabilizer. Place the front tips of the VGs 120mm in front of the rivet line on the underside of the elevator spar, at a spacing  of 30mm.  The curvature of the elevator increases at this point, and basically you are just trying to get the VGs as far forward as possible.

Return to 701 page


Policies
Built on ShoutCMS